
In this article, I'm going to describe our experience creating a WorkAdventure bot using the new OpenAI's Realtime API. This API is revolutionary because it allows you to interact with an AI model in speech to speech mode.
Before diving into the details, let's take a look at the final result:
This article is targeted at developers who want to start using the new OpenAI's Realtime API in their projects. The API is still in beta as I'm writing this article so things might have moved when you will read this article.
Previously, to interact with an AI model, you had to turn your voice into text, send it to the model, and then turn the model's response back into speech. This process was somewhat slow. It could take a few seconds for the AI to respond, leading to an awkward conversation.
We have already experimented with the previous OpenAI API in WorkAdventure. The results were good, but the conversation was not as smooth as we would have liked.
With the new OpenAI's Realtime API, the model directly takes your voice as input and responds in real-time. This makes the conversation smoother. Furthermore, because there is no need to convert speech to text, the model does not loose important information that could be lost during the transcription process, like the tone of your voice. And it can also respond with an appropriate tone.
The API is still in beta, but demos were very impressive. So we decided to give it a try.
Interacting with the API is very different from the previous chat completion API. Because we are dealing with audio, the API keeps sending and receiving messages. This is done through a WebSocket. The API sends audio chunks to the model and receives audio chunks as responses. Because we are using a WebSocket, the API is now stateful. This means you no longer need to resend the context of the conversation at each turn. The model keeps track of the conversation context and can respond accordingly.
The context of WorkAdventure is somewhat special. Bots are actually scripts that run in JavaScript on the browser side. Each bot is running in a headless browser tab on a server. Bots are using the Scripting API to interact with the WorkAdventure map. Because the bots are running in a browser, on the server-side, we can actually put the OpenAI key right into the browser. This saves us from having to manage the key on the server-side and use a separate server as a proxy to the API.

If you are looking to implement the real-time API in your own project, it is likely your setup will be different. You might need a relay server that will live on the server, take calls from the client, and forward them to the OpenAI API, adding the API key in the process. I would also like to mention that Livekit seems to have a great higher-level library for handling bots: https://docs.livekit.io/agents/openai/overview/ I haven't had the opportunity to test it yet, but it looks promising and you probably should have a look at it before starting.
Getting started
Instead of directly talking on the WebSocket with the OpenAI Realtime API, we decided to use a wrapper library provided by OpenAI: https://github.com/openai/openai-realtime-api-beta.
$ npm install openai/openai-realtime-api-beta --save
This wrapper is still in its infancy:
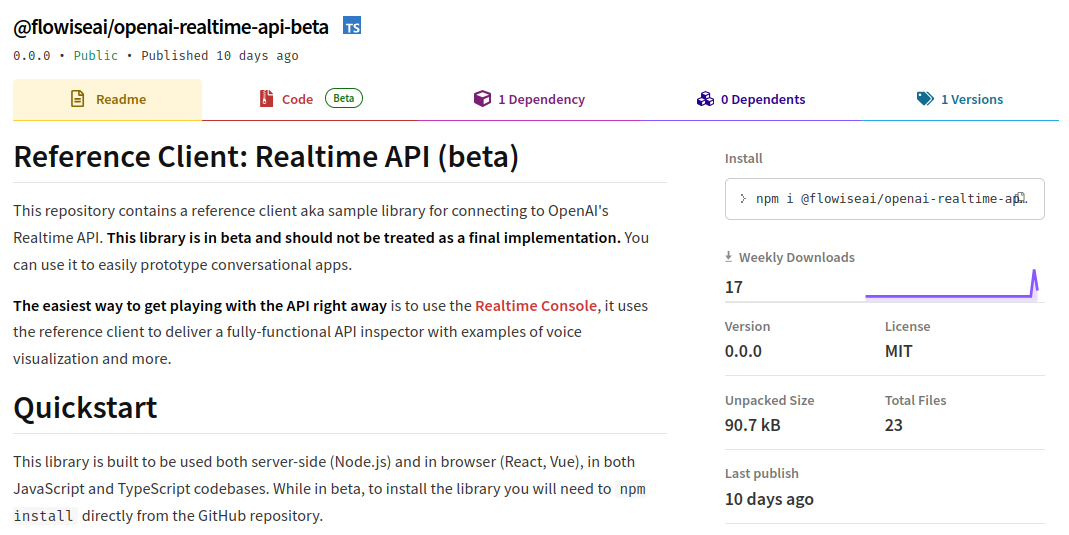
Yeah... version 0.0.0 with 17 weekly downloads. This is bleeding-edge technology!
Now that the library is installed, let's create our "Robot" class that will handle the communication with the API:
import {RealtimeClient} from "@openai/realtime-api-beta";

class Robot {
    private realtimeClient: RealtimeClient;

    constructor(
        private audioTranscriptionModel = "whisper-1",
        private voice = "alloy",
    ) {
    }

    async init(instructions: string): Promise<void> {
        console.log("Robot is starting...");

        this.realtimeClient = new RealtimeClient({
            // In WorkAdventure, we get the API key from the URL hash
            // parameters.
            // The way you get the API key will depend on your setup.
            apiKey: WA.room.hashParameters.openaiApiKey,
            // We are fine with having the API key in the browser because
            // this is a headless browser running on the server.
            dangerouslyAllowAPIKeyInBrowser: true,
        });

        // The "session", in the Realtime API, refers to the WebSocket
        // connection.
        // There is one session per WebSocket connection.

        // We update the session with the instructions we want to send to
        // the model.
        this.realtimeClient.updateSession({
            instructions: instructions
        });

        // We update the session with the voice and the audio transcription
        // model we want to use.
        this.realtimeClient.updateSession({voice: this.voice});
        this.realtimeClient.updateSession({
            // VAD means "Voice Activity Detection".
            // In "server_vad" mode, we let OpenAI decide when to start and
            // stop speaking.
            turn_detection: {type: 'server_vad'},
            input_audio_transcription: {model: this.audioTranscriptionModel},
        });

        // Each time the conversation is updated (each time we receive a
        // bit of audio from the model or a word from the transcription),
        // this callback is called.
        this.realtimeClient.on('conversation.updated', (event) => {
            console.log(event.delta);
            if (event.delta.audio) {
                // Let's do something with the audio.
            }
        });

        // Connect to Realtime API
        // Note: in the future, we should be able to pass the LLM model here.
        await this.realtimeClient.connect();

        // Send an initial message to the model to trigger a response.
        this.realtimeClient.sendUserMessageContent([
            {type: 'input_text', text: `How are you?`}
        ]);
    }
}
At this point, we can see in the console that the model is responding with audio chunks.
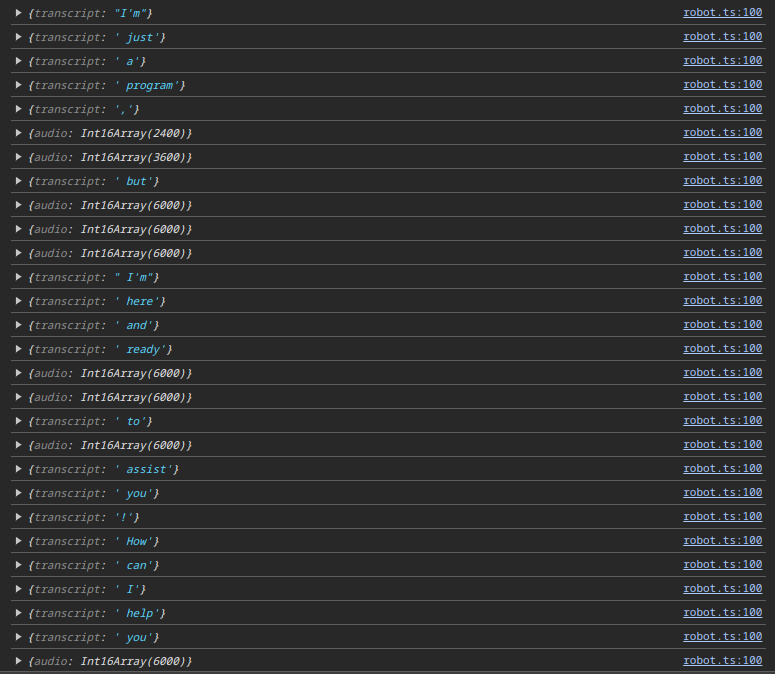
If we take a look at the "delta" part of the event, we can see some events contain "transcripts", which are usually single words, and other events contain "audio" chunks.
Playing the audio
The next step is to send the audio chunks to the browser's audio API to play the audio. In the case of WorkAdventure, the audio would be played in the headless browser on the server.
"On the server, no one can hear you scream."
-- Alien... almost (1979)
Ok, so we have the audio chunks and we need to turn them into a MediaStream. A media stream is a stream of audio data that can be played by the browser. We can create a MediaStream from an array of audio chunks. The MediaStream can then be played by the browser
or sent to a WebRTC connection.
The audio chunks sent by the Realtime API are in a PCM 16 format (that is: raw 16 bit PCM audio at 24kHz, 1 channel, little-endian).
In the browser however, the API in charge of managing audio is the Web Audio API. It is operating on 32bit float numbers. So we need to convert the 16bit integer audio chunks into 32bit float audio chunks.
First of all, I was very worried about this 'little-endian' thing. Little endian means that the least significant byte is stored first. Handling that in JavaScript is not straightforward. However, when dealing with audio output from OpenAI, the audio is correctly formatted, so you don't have to worry about endianness.
So turning from 16bit PCM to 32bit float is actually turning an integer value between -32768 and 32767 into a float value between -1 and 1. Which is quite simple.
Here is the code to do this conversion:
const int16Array = event.delta.audio;

// Convert Int16Array to Float32Array as the Web Audio API uses Float32
const float32Array = new Float32Array(int16Array.length);
for (let i = 0; i < int16Array.length; i++) {
    // Convert 16-bit PCM to float [-1, 1]
    float32Array[i] = int16Array[i] / 32768.0;
}
Now that we have the audio in the correct format, we need to create a MediaStream from it.
There are many ways to do that. The simplest one involves using a ScriptProcessorNode. This is easy, but unfortunately,
it is deprecated. You can also use a AudioBufferSourceNode but the documentation says it does not play well with streaming
audio and is more adapted to play short audio clips.
The technique I will use is using the AudioWorkletNode. This is the modern way to do things, but it is a bit more complex.
Audio worklets are running in a separate thread and can be used to process audio in real-time. Although we don't perform heavy computations that could block the main thread, the usage of audio worklets mandates processing audio in a separate thread.

The audio worklet can receive audio chunks if a MediaStream is plugged in input and can send some audio output to a destination
MediaStream. It can also communicate with the main thread using the postMessage API.
In this case, we will use the audio worklet to play the audio chunks we receive from the Realtime API. We will send the
audio chunks to the audio worklet using the postMessage API and the audio worklet will generate a MediaStream.

The code will be split into 2 files. One file is containing the audio worklet processor and the other file is the main file that will create the audio worklet node and connect it to the audio output.
Let's start with the audio worklet processor (the one running in a dedicated thread)
Data will be arriving via the postMessage API (in the onmessage method), as an object with this structure:
{
    pcmData: Float32Array
}
The pcmData field contains the audio data in the correct format (32bit float). We will store this data in the audioQueue.
class OutputAudioWorkletProcessor extends AudioWorkletProcessor {
    private audioQueue: Float32Array[] = [];

    constructor() {
        super();
        this.port.onmessage = (event: MessageEvent) => {
            const data = event.data.pcmData;
            if (data instanceof Float32Array) {
                this.audioQueue.push(data);
            } else {
                console.error("Invalid data type received in worklet",
                    event.data);
            }
        };
    }

    process(inputs: Float32Array[][],
            outputs: Float32Array[][],
            parameters: Record<string, Float32Array>): boolean {
        const output = outputs[0];
        const outputData = output[0];

        let nextChunk: Float32Array | undefined;
        let currentOffset = 0;
        while (nextChunk = this.audioQueue[0]) {
            if (currentOffset + nextChunk.length <= outputData.length) {
                // If the next chunk fits in the output buffer,
                // copy it and remove it from the queue
                outputData.set(nextChunk, currentOffset);
                currentOffset += nextChunk.length;
                this.audioQueue.shift();
            } else {
                // If the next chunk does not fit in the output buffer,
                // copy only what fits and keep the rest in the queue
                outputData.set(
                    nextChunk.subarray(0, outputData.length - currentOffset),
                    currentOffset);
                this.audioQueue[0] = nextChunk.subarray(
                    outputData.length - currentOffset
                );
                break;
            }
        }

        return true; // Keep processor alive
    }
}

// Required registration for the worklet
registerProcessor('output-pcm-worklet-processor', OutputAudioWorkletProcessor);
export {};
When the processor is running, the process method is called each time the audio worklet needs to process audio data
(so every few milliseconds). The process method has "inputs" and "outputs" parameters. The "inputs" parameter will
be completely ignored in our case. The "outputs" parameter is an array of arrays of Float32Arrays. The first array
contains the output data. In our case, we will only use the first output array.
If there is data in the audioQueue, the processor will copy the data to the output buffer, trying to fill it as much
as possible. It is important to note that when the process function is called, the output buffer is already filled with
zeros (silence). So if there is no data in the audioQueue, the output buffer will be filled with silence. This is
exactly what we want.
Last but not least, please note that we call registerProcessor at the end of the file. The output-pcm-worklet-processor is
the name we will use to create the audio worklet node in the main file.
Typescript support
If you are using Typescript, it is likely you will be missing the AudioWorkletProcessor type. There is a NPM package
to add this (@types/audioworklet), but it conflicts with the
DOM types. So instead, I copied types from a GitHub issue found here
into my project.
Did I say that we are working on bleeding-edge technology? Yes, we are.
Instantiating the audio worklet node in the main file
Now that we have the audio worklet processor, we need to create the audio worklet node in the main file.
From a bird's eye view, without any error management, the process looks like this:
// Sample rate returned by OpenAI is 24kHz
const audioContext = new AudioContext({ sampleRate: 24000 });

// Let's create the MediaStream
const mediaStreamDestination = this.audioContext.createMediaStreamDestination();

await this.audioContext.resume();

// Let's load the audio worklet processor (assuming the file is available in the pcm-processor.js)
await this.audioContext.audioWorklet.addModule("output-pcm-processor.js");

// Instantiate the audio worklet node (we use the 'output-pcm-worklet-processor' string to match the name we used in the registerProcessor call)
const workletNode = new AudioWorkletNode(this.audioContext, 'output-pcm-worklet-processor');

// Connect the worklet node to the media stream destination
workletNode.connect(this.mediaStreamDestination);
In practice, it is a bit more complex. In a real-world application, you will use a bundler. So we cannot reference the "pcm-processor.js" file directly without letting the bundler know about it.
In our case, we are using Vite.
In Vite, we can use the "?worker&url" parameter in imports to reference a file directly. This is very useful for our use case.
import audioWorkletProcessorUrl from "./pcm-processor.ts?worker&url";

// ...
await this.audioContext.audioWorklet.addModule(audioWorkletProcessorUrl);
When this is done, we can send the audio chunks to the audio worklet processor:
workletNode.port.postMessage(
    { pcmData: float32Array },
    { transfer: [float32Array.buffer] }
);
The transfer option is used to transfer the ownership of the buffer to the audio worklet processor. This is important
because the buffer is a large object and we don't want to copy it (that would waste CPU cycles). We want to transfer it.
And that's it!
The full class looks like this:
import audioWorkletProcessorUrl from "./AudioWorkletProcessor.ts?worker&url";

export class OutputPCMStreamer {
    private audioContext: AudioContext;
    private mediaStreamDestination: MediaStreamAudioDestinationNode;
    private workletNode: AudioWorkletNode | null = null;
    private isWorkletLoaded = false;

    constructor(sampleRate = 24000) {
        this.audioContext = new AudioContext({ sampleRate });
        this.mediaStreamDestination =
            this.audioContext.createMediaStreamDestination();
    }

    // Initialize the AudioWorklet and load the processor script
    public async initWorklet() {
        if (!this.isWorkletLoaded) {
            try {
                await this.audioContext.resume();
                await this.audioContext.audioWorklet.addModule(audioWorkletProcessorUrl);
                this.workletNode = new AudioWorkletNode(this.audioContext, 'output-pcm-worklet-processor');
                this.workletNode.connect(this.mediaStreamDestination);
                this.isWorkletLoaded = true;
            } catch (err) {
                console.error('Failed to load AudioWorkletProcessor:', err);
            }
        }
    }

    // Method to get the MediaStream that can be added to WebRTC
    public getMediaStream(): MediaStream {
        return this.mediaStreamDestination.stream;
    }

    // Method to append new PCM data (Int16Array) to the audio stream
    public appendPCMData(float32Array: Float32Array): void {
        if (!this.isWorkletLoaded || !this.workletNode) {
            console.error('AudioWorklet is not loaded yet.');
            return;
        }

        // Send the PCM data to the AudioWorkletProcessor via its port
        this.workletNode.port.postMessage(
            { pcmData: float32Array },
            {transfer: [float32Array.buffer]}
        );
    }

    // Method to close the AudioWorkletNode and clean up resources
    public close(): void {
        if (this.workletNode) {
            // Disconnect the worklet node from the audio context
            this.workletNode.disconnect();
            this.workletNode.port.close(); // Close the MessagePort

            // Set the worklet node to null to avoid further use
            this.workletNode = null;
        }

        // Optionally, stop the AudioContext if no longer needed
        if (this.audioContext.state !== 'closed') {
            this.audioContext.close().then(() => {
                console.log('AudioContext closed.');
            }).catch((err) => {
                console.error('Error closing AudioContext:', err);
            });
        }

        this.isWorkletLoaded = false;
    }
}
From there, you can use the PCMStreamer class to stream audio data to a MediaStream that can be used in a WebRTC connection.
Whenever the Realtime API is sending an audio chunk, you convert it to a Float32Array and send it to the PCMStreamer instance
via the appendPCMData method.
this.realtimeClient.on('conversation.updated', (event) => {
    if (event.delta.audio) {
        const int16Array = event.delta.audio;
        // Convert Int16Array to Float32Array as the Web Audio API uses Float32
        const float32Array = new Float32Array(int16Array.length);
        for (let i = 0; i < int16Array.length; i++) {
            float32Array[i] = int16Array[i] / 32768.0; // Convert 16-bit PCM to float [-1, 1]
        }

        audioStream.appendAudioData(float32Array);
    }
});
Success!
But this is only the beginning. So far, we are getting audio chunks from the Realtime API and playing them in the browser. Now, we need to send our audio data to the Realtime API!
Sending audio to the Realtime API
The Realtime API is expecting audio chunks in the PCM 16 format. This is the same format as the audio chunks we are receiving.
Hopefully, the openai-realtime-api-beta library manages automatic conversion of 32bit float audio data to 16bit PCM audio data in little endian on our behalf (the little endian part is important here).
We will just have to make sure we are sending the samples at the requested 24kHz sample rate.
Turning a MediaStream into audio chunks turns out to be quite similar to what we did previously. We will use the Web Audio API,
design a new Worklet. This time, the Worklet will receive a MediaStream -- in the case of WorkAdventure were multiple people
can talk to the IA at the same time, it can receive many MediaStreams. The MediaStreams will be mixed together and sent
back to the main thread using the postMessage API.

The code of our audio Worklet will look like this:
class InputAudioWorkletProcessor extends AudioWorkletProcessor {
    process(inputs: Float32Array[][], outputs: Float32Array[][], parameters: Record<string, Float32Array>): boolean {

        if (!inputs || inputs.length === 0 || inputs[0].length === 0) {
            return true; // Keep processor alive
        }

        // Let's merge all the inputs in one big Float32Array by summing them
        const mergedInput = new Float32Array(inputs[0][0].length);

        for (let k = 0; k < inputs.length; k++) {
            const input = inputs[k];
            const channelNumber = input.length;
            for (let j = 0; j < channelNumber; j++) {
                const channel = input[j];
                for (let i = 0; i < channel.length; i++) {
                    // We are dividing by the number of channels to avoid clipping
                    // Clipping could still happen if the sum of all the inputs is too high
                    mergedInput[i] += channel[i] / channelNumber;
                }
            }
        }

        this.port.postMessage({ pcmData: mergedInput }, {transfer: [mergedInput.buffer]});

        return true; // Keep processor alive
    }
}

// Required registration for the worklet
registerProcessor('input-pcm-worklet-processor', InputAudioWorkletProcessor);
export {};
A quick note about the parameters passed to the process function.
The inputs parameter is an array of arrays of Float32Arrays. Why do we have an array of array of array?
The innermost array is the audio data for a single channel. Each value represents the audio level at a given time.
But microphones can be stereo. In this case, we don't have one, but two channels. So we wrap the Float32Arrays into an array
that will contain one channel if the microphone is mono, or two channels if the microphone is stereo.
But we can also have many input data sources! (many microphones, or many streams coming from different WebRTC sources...). The third array is used to represent the different input sources.
On each call to the process function, we will sum all the input sources together to create a single audio stream, and send
this stream to the main thread via the postMessage API.
The code to instantiate the audio Worklet in the main file will look like this:
import audioWorkletProcessorUrl from "./input-pcm-processor.ts?worker&url";

// Sample rate required by OpenAI is 24kHz
const audioContext = new AudioContext({ sampleRate: 24000 });

await this.audioContext.resume();

// Let's load the audio worklet processor (assuming the file is available in the pcm-processor.js)
await this.audioContext.audioWorklet.addModule(audioWorkletProcessorUrl);

// Instantiate the audio worklet node (we use the 'input-pcm-worklet-processor' string to match the name we used in the registerProcessor call)
const workletNode = new AudioWorkletNode(this.audioContext, 'input-pcm-worklet-processor');

// Connect the media stream as an input to our worklet node (this assume you already have a "mediaStream" variable connected
// to your microphone)
const sourceNode = this.audioContext.createMediaStreamSource(mediaStream);
sourceNode.connect(workletNode);

workletNode.port.onmessage = (event: MessageEvent) => {
    const data = event.data.pcmData;
    if (data instanceof Float32Array) {
        console.log('Received audio data from the input worklet:', data);
    } else {
        console.error("Invalid data type received in worklet", event.data);
    }
};
Sending the audio chunks to the Realtime API
Sending the audio chunks to the Realtime API is quite simple. We just need to call the appendInputAudio method of the RealtimeClient.
The data we pass must be a 16bit PCM audio buffer. We can use the RealtimeUtils.floatTo16BitPCM method provided by the Realtime API to
convert the 32bit float audio data to 16bit PCM.
this.realtimeClient.appendInputAudio(RealtimeUtils.floatTo16BitPCM(audioBuffer));
However, just doing this will lead to a conversation that will fail after a few seconds. In our experience, this is because we are calling the Realtime API too often.
Throttling the audio chunks
Out of the box, when I tested the Audio Worklet, it generated Float32Array with 128 samples (i.e. 128 values in the array). Because we run at 24kHz, this means we are sending 24000 / 128 = 187.5 chunks per second. This is probably a bit too much for the Realtime API.
We don't need to send audio chunks at a very high rate. One audio chunk every ~50ms should be more than enough. That means we could target a chunk size of 24000 * 0.05 = 1200 samples.
We can simply buffer the audio chunks in the main thread and send them to the Realtime API when we have enough data.
const audioBuffer = new Float32Array(24000 * 0.05); // 50ms of audio data

workletNode.port.onmessage = (event: MessageEvent) => {
    const data = event.data.pcmData;
    if (data instanceof Float32Array) {
        if (bufferIndex + data.length > audioBuffer.length) {
            // If the buffer is going to be filled, keep filling it until it is full, then send the audio to the Realtime API.
            audioBuffer.set(data.subarray(0, audioBuffer.length - bufferIndex), bufferIndex);
            this.realtimeClient.appendInputAudio(RealtimeUtils.floatTo16BitPCM(audioBuffer));
            bufferIndex = 0;
            // Finally, append the remaining data to the buffer
            audioBuffer.set(data.subarray(audioBuffer.length - bufferIndex));
        } else {
            // Otherwise, append the data to the buffer
            audioBuffer.set(data, bufferIndex);
            bufferIndex += data.length;
        }
    } else {
        console.error("Invalid data type received in worklet", event.data);
    }
};
Managing interruptions
The Realtime API is sending audio chunks faster that we can play them. It means at some point in time, we might have
several seconds of audio chunks in our OutputAudioWorklet.
If we interrupt the conversation, this buffer is already on our computer and will still be played. This is not what we want.
Hopefully, in VAD mode, the Realtime API is sending a conversation.interrupted event whenever it detects the user
has interrupted the conversation. We can use this event to clear the buffer. The buffer is inside the OutputAudioWorklet
so we need to send a message to the worklet to clear the buffer.
Let's say that if we receive the following event, we clear the buffer:
{
    emptyBuffer: true
}
The updated audio worklet code will look like this:
class OutputAudioWorkletProcessor extends AudioWorkletProcessor {
    private audioQueue: Float32Array[] = [];

    constructor() {
        super();
        this.port.onmessage = (event: MessageEvent) => {
            // In case the event is a buffer clear event, we empty the buffer
            if (event.data.emptyBuffer === true) {
                this.audioQueue = [];
            } else {
                const data = event.data.pcmData;
                if (data instanceof Float32Array) {
                    this.audioQueue.push(data);
                } else {
                    console.error("Invalid data type received in worklet", event.data);
                }
            }
        };
    }

    //...
}
On the main thread side, we can add an additional method to the OutputPCMStreamer class to clear the buffer:
export class OutputPCMStreamer {
    // ...
    public resetAudioBuffer(): void {
        if (!this.isWorkletLoaded || !this.workletNode) {
            console.error('AudioWorklet is not loaded yet.');
            return;
        }

        // Send the PCM data to the AudioWorkletProcessor via its port
        this.workletNode.port.postMessage({ emptyBuffer: true });
    }
}
When we receive the conversation.interrupted event, we can call the resetAudioBuffer method of the OutputPCMStreamer instance.
this.realtimeClient.on('conversation.interrupted', () => {
    outputPCMStreamer.resetAudioBuffer();
});
What's remaining?
The system is working well, but there is still room for improvement.
Remember that OpenAI sends audio chunks faster than we can play them? Just imagine if the conversation is interrupted. We are going to remove a lot of audio chunks for the buffer, but we did not tell the Realtime API that those audio chunks have not been played. So the Realtime API will "think" we heard everything it said, but we didn't.
We will fix this in the next article.
Using WorkAdventure?
If you are using WorkAdventure (you should!) and are looking to implement a bot using the Realtime API, we added a few methods to the scripting API to help you with that.
You can now use WA.player.proximityMeeting.listenToAudioStream to listen to an audio streams coming from a bubble,
and WA.player.proximityMeeting.startAudioStream to send an audio stream to a bubble.
This will make things considerably easier for you as we take care of the audio worklet instantiation and the audio stream management.
Conclusion
This is it! We have a fully working system that allows us to interact with bots via voice! The bots reactivity is insane. The conversation is smooth and the tone of the bot is appropriate.
It took us about 3 days of work to get this first version working and we are very happy with the result. We are now looking forward to integrating this system deeper into WorkAdventure, by adding more features via the function calling feature of the Realtime API!
Next steps will be to have the bot better handle interruptions, and then react to the environment, guide you through your office, etc...
Read the next article!