Getting started with GitHub Pages
While this was the default recommended way to host your map in the past, we now recommend hosting your maps on the WorkAdventure server directly. It is easier to set up and maintain. However, hosting your maps on GitHub Pages is still a valid option and will keep being supported.
Start by creating a GitHub account if you don't already have one.
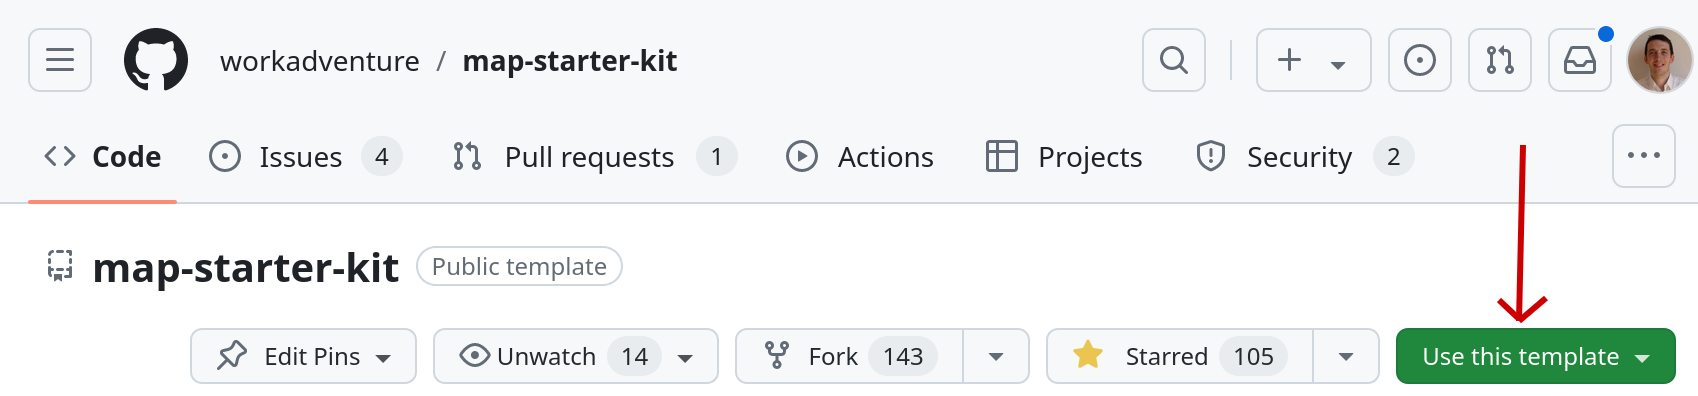
Then, go to the GitHub map starter kit repository page and click the "Use this template" button.
You will be prompted to enter a repository name for your map.
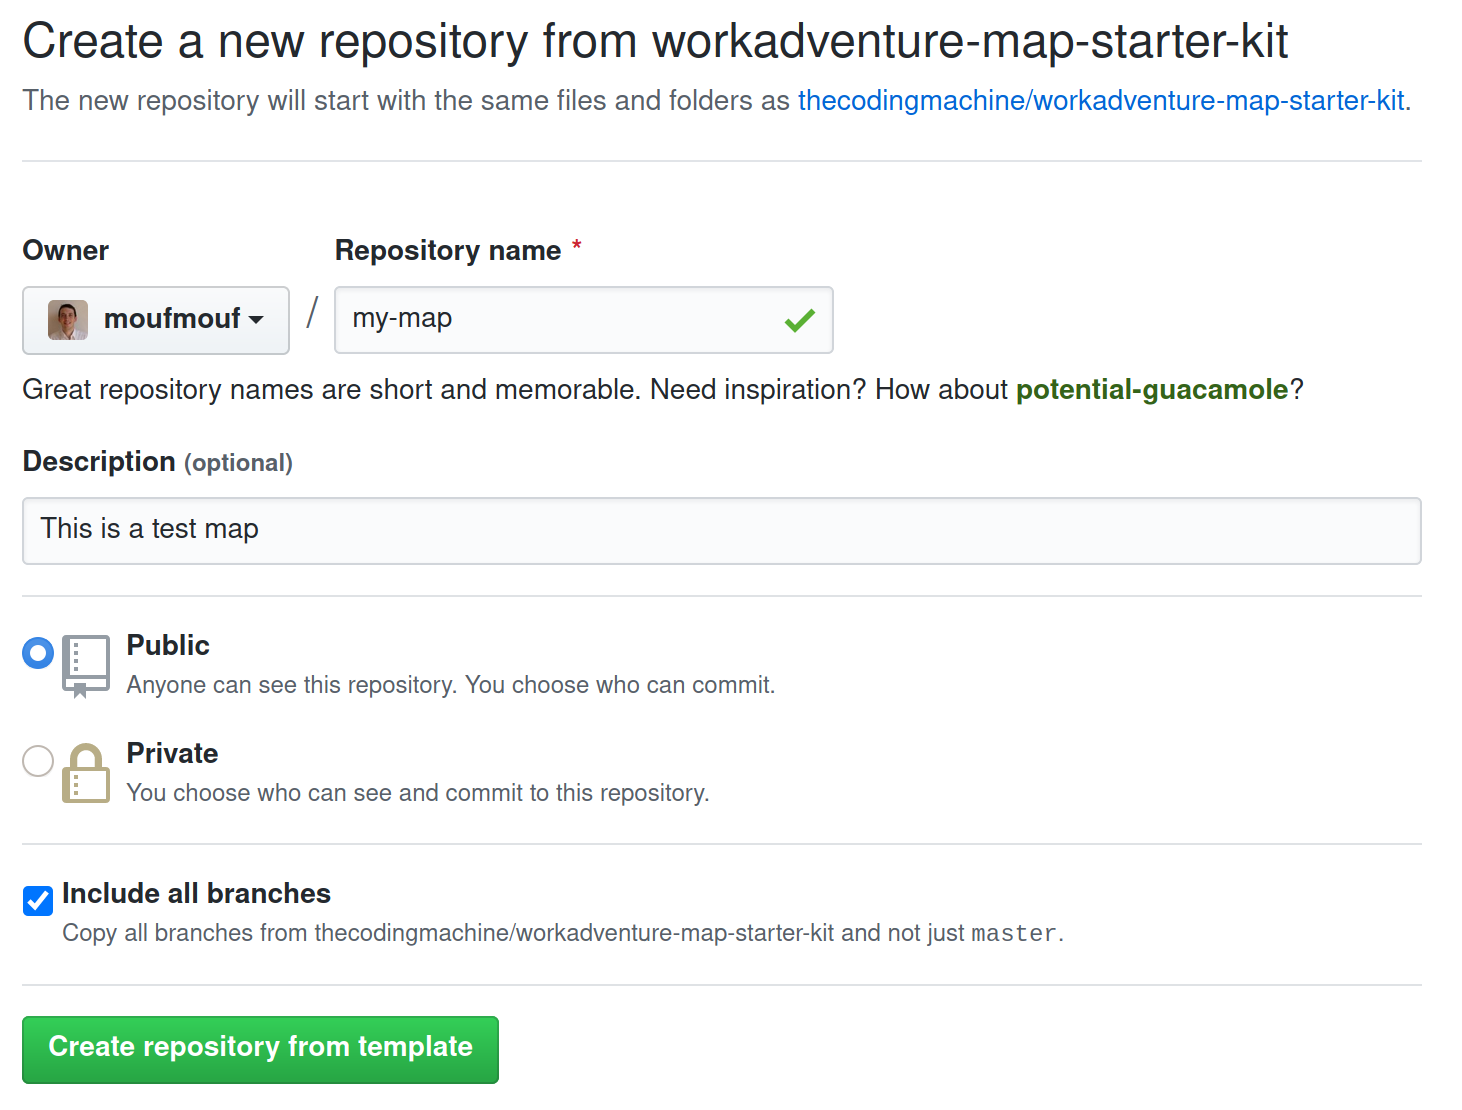
Make sure to check the "Include all branches" checkbox, otherwise the GitHub Pages deployment process will not be setup automatically.
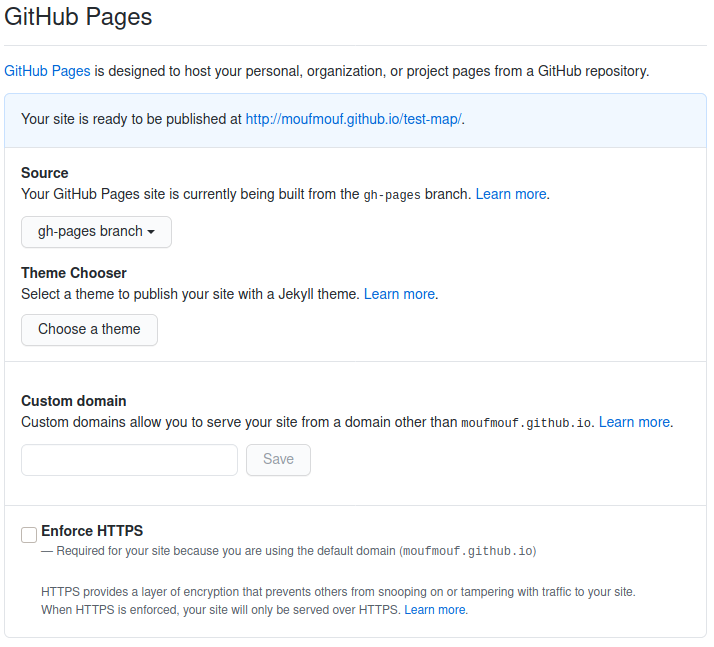
If you miss that step, don't worry, you can always fix that by clicking on the Settings tab of your repository and scroll down to the GitHub Pages section. Then select the gh-pages branch. It might already be selected, but please be sure to click on it nonetheless (otherwise GitHub will not enable GitHub pages).
If you only see a "master" branch and if the gh-pages branch does not appear here, simply wait a few minutes and refresh your page. When you created the project, GitHub Actions triggered a job that is in charge of creating the gh-pages branch. Maybe the job is not finished yet.
Wait a few minutes... GitHub will deploy a new website with the content of the repository. The address of the website is visible in the "GitHub Pages" section.
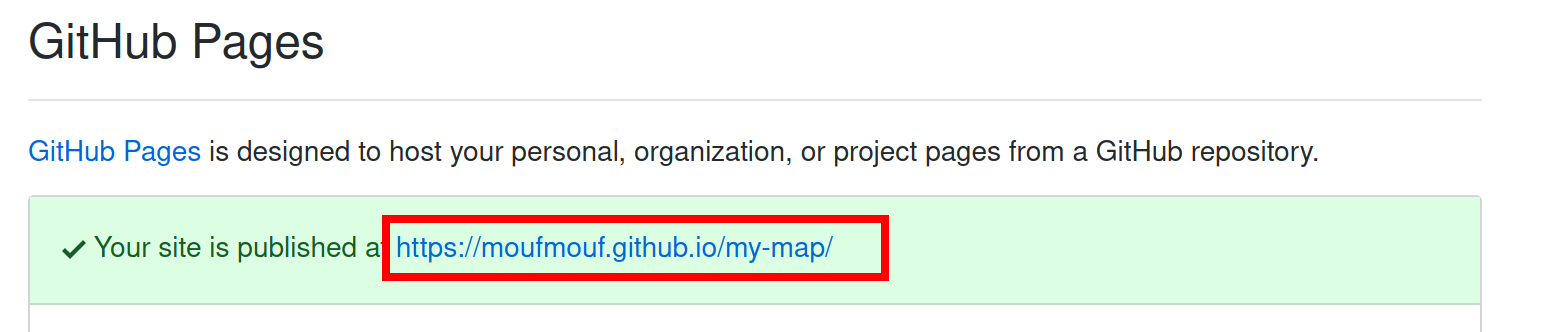
Click on the link. You should be redirected directly to WorkAdventure, on your map!
Update your map on GH Pages
Before your push on GitHub, you need to instruct the CI/CD pipeline you want to deploy to GitHub pages. To do this,
set up your environment variable in .env file like this : UPLOAD_MODE=GH_PAGES
After making this change, just push to GitHub and your map will be deployed to GitHub Pages.
Testing your map
To test your map, you need to find its URL. There are 2 kinds of URLs in WorkAdventure:
- Test URLs are in the form
https://play.workadventu.re/_/[instance]/[server]/[path to map] - Registered URLs are in the form
https://play.workadventu.re/@/[organization]/[world]/[map]
Assuming your JSON map is hosted at "https://myuser.github.io/myrepo/map.json", then you can browse your map at "https://play.workadventu.re/_/global/myuser.github.io/myrepo/map.json". Here, "global" is a name of an "instance" of your map. You can put anything instead of "global" here. People on the same instance of the map can see each others. If 2 users use 2 different instances, they are on the same map, but in 2 parallel universes. They cannot see each other.
This will connect you to a "public" instance. Anyone can come and connect to a public instance. If you want to manage invitations, or to perform some moderation, you will need to create a "private" instance. Private instances are available in "pro" accounts.
Need some help?
WorkAdventure is a constantly evolving project and there is plenty of room for improvement regarding map editing. If you are facing any troubles, do not hesitate to seek help in our Discord server or open an "issue" in the GitHub WorkAdventure account.