How to stream conferences
Depending on the size of your event and the kind of interactions you are expecting with your audience, you can choose from a variety of solutions for your conference.
Let's review the available solutions.
- Up to about 30 people, you can hold your conference inside a classic "meeting room". The speaker can share his/her screen and anyone can ask questions at any point in time. Of course, the speaker or an administrator can moderate the talk.
- If you are planning more than 30 attendees, you should consider building a "podium". The speaker will speak on this podium and the talk will be broadcast to the audience using YouTube Live (attendees can see the YouTube Live feed inside WorkAdventure).
- Finally, you are also free to use any third party conference tool you see fit. Since WorkAdventure has the ability to embed any website as an iFrame, you can choose any third-party conference tools available to you.
Small conferences / meetups
For small conferences (about 30 users), you can simply invite your users in a Jitsi meeting room.
Jitsi is well suited for those use cases because:
- It enables fluid communication with the participants (anyone can enable his/her microphone and webcam to communicate with the speaker
- The speaker (or a moderator) can monitor manually users who would behave poorly
If you opt for Jitsi, the important part is to configure properly who is getting moderation rights. Let's review this part in details.
Step-by-step guide
1- Create a user with a moderator/speaker tag
Let's say you want to grant moderator rights to anyone who has the "speaker" tag.
The first step is of course to create users with the "speaker" tag. You can do this in the members list of WorkAdventure administration console.
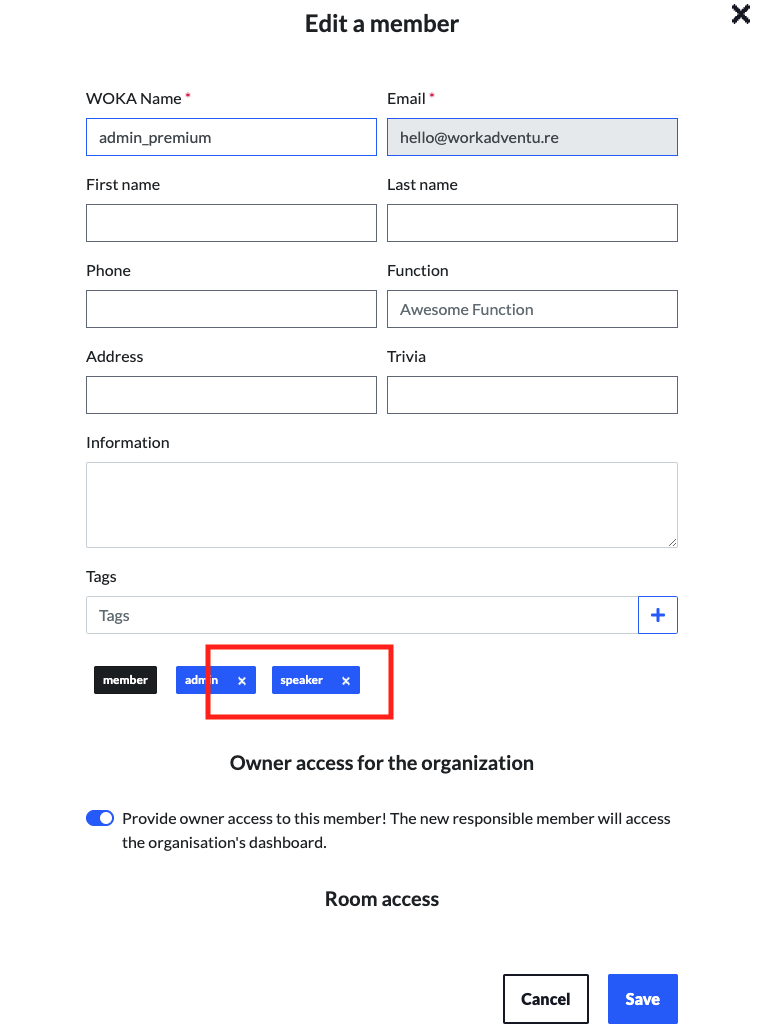
Create a new member (or edit an existing member) and in the "tags" section, add a new "speaker" tag.
2- Edit your map to configure the Jitsi layer
Now, you need to edit your map to explain that anyone with the "speaker" tag is a moderator.
To do this, go to Tiled, and edit the properties of the Jitsi layer of your map.
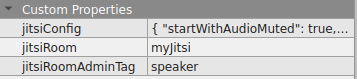
Add a jitsiRoomAdminTag property that will contain the name of a tag (in our case: "speaker"). Any member with the tag "speaker" will be a moderator of this Jitsi meeting.
One additional property you may want to add is the "auto mute" property. When a user enters the Jitsi conference room, he/she should be muted by default. Otherwise, people coming in/out will disturb the speaker. To mute automatically people (and disable their webcam by default, use this property:
jitsiConfig: { "startWithAudioMuted": true, "startWithVideoMuted": true }
3- Login with the moderator/speaker account
The last thing that remains is to log in with the correct user. Go to the members list, click on the member in the list and copy and paste the "Token access" URL. This "autologin" URL can be used to log into WorkAdventure with the given member.
Large conferences
If you are expecting a large audience (from 30 users to several thousand users), you should consider building a "podium".
A single Jitsi is not well suited for large conferences. As the number of users increases, it is getting harder to see who is the current speaker, and the growing list of participants can become confusing. Furthermore, after about 100 concurrent users, we are reaching the technical limits of Jitsi and the conference room might altogether crash and stop responding.
So for large conferences, our advice is to use a dedicated tool. In this section, we will explain how to use Jitsi in conjunction with YouTube Live to stream your event to a large number of users.
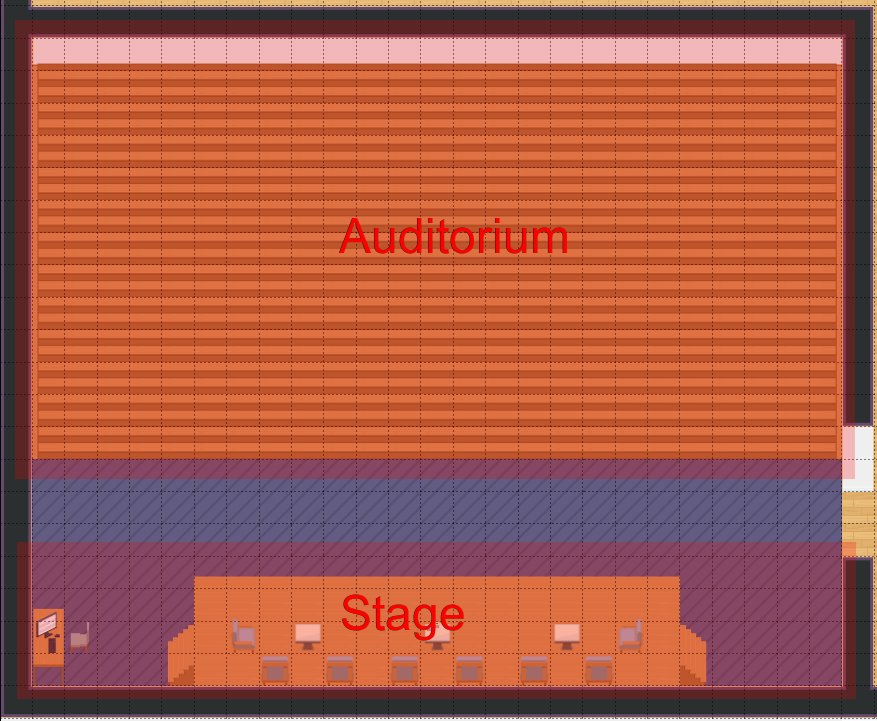
To do this, you will need to split your conference room into 2 areas.
- 1- Build a stage. On the stage, place a Jitsi meet zone. Anyone walking on the stage will be part of the conference and be able to speak and interact with the speaker(s).
- 2- Build an auditorium. The auditorium is where your attendees are seating. In the auditorium, the attendees will see the YouTube Live video.
There are a number of advantages to do this:
- The Jitsi room will only contain the speakers so will be uncluttered by all the attendees
- It is very easy to hop on and off from the stage, so a participant can still come and ask questions on the stage directly (just like in a real conference!)
- YouTube Live is an extremely reliable solution to deliver live streams to a wide audience (+ you can make your conference available for replay on YouTube without any extra effort)
You need to be aware of a few drawbacks:
- There is a slight delay between the Jitsi stream and the YouTube Live stream. Don't forget to configure the delay to "Ultra low latency" if you expect participants to come on stage and ask questions. The typical delay in "Ultra low latency" is 3 to 7 seconds.
- Not all YouTube accounts can embed a Live stream into WorkAdventure. Which accounts can stream is not entirely clear (and mostly undocumented from Google) but out personal experience is that you need an account that was created before 2020, or your YouTube account must be linked to AdSense. Linking your YouTube account to Adsense can take up to 7 days, so you need to plan in advance.
Step-by-step guide
1- Create a user with a moderator/speaker tag
Let's say you want to grant moderator rights to anyone who has the "speaker" tag.
The first step is of course to create users with the "speaker" tag. You can do this in the members list of WorkAdventure administration console.
Create a new member (or edit an existing member) and in the "tags" section, add a new "speaker" tag.
Only moderators have the right to start streaming to YouTube Live. Therefore, you need someone on stage that has the Jitsi moderator rights. This will often be the speaker for medium-sized conferences, or a dedicated staff member for larger conferences.
2- Edit your map to create the Jitsi stage
Now, you need to edit your map and define a "Jitsi" stage.
On this Jitsi layer, you need to explain that anyone with the "speaker" tag is a moderator.
To do this, go to Tiled, and edit the properties of the Jitsi layer of your map.
Add a jitsiRoomAdminTag property that will contain the name of a tag (in our case: "speaker"). Any member with the tag "speaker" will be a moderator of this Jitsi meeting.
3- Find your YouTube API key
Go to YouTube, login, then connect to YouTube Live by clicking the "Camera" menu and then the "Go Live" menu item.

If this is the first time you are accessing YouTube Studio, it can take up to 24 hours to enable your account.
In the YouTube Studio page, get the "default stream key". This key is a code that you will give to your speaker (or the moderator) of the Jitsi room. The key will be needed in Jitsi to stream to your YouTube channel. Put that key in a safe place and keep it for later.

Additionally, set the "Stream latency" to "Ultra low-latency" if you plan to interact with the audience. Otherwise, you will have a 30 seconds delay that will make answering questions in live really awkward.
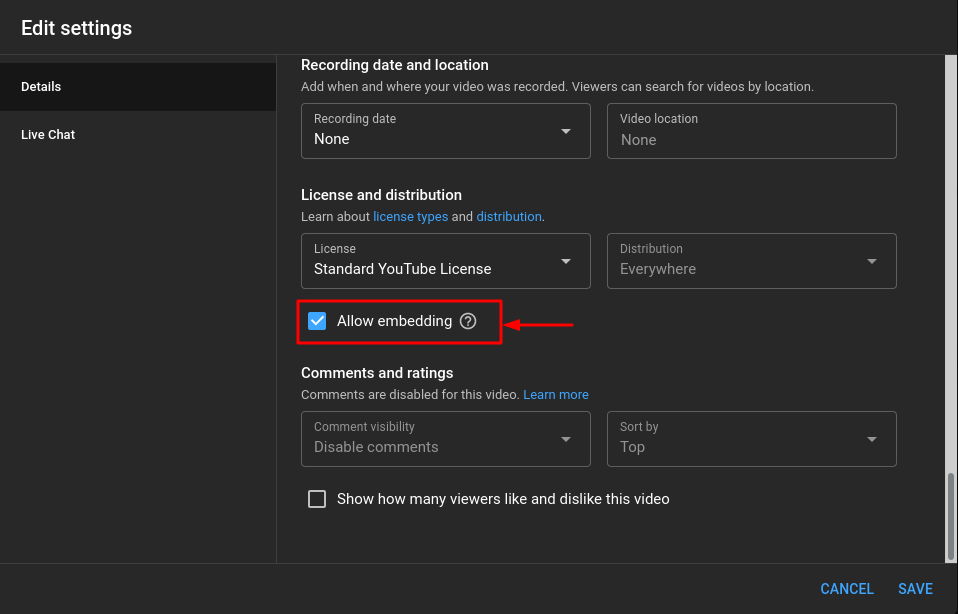
Finally, you need to configure your stream to be "embeddable" in WorkAdventure. Click on the "Edit" button next to your stream. Scroll down the list of options until you find "Allow embedding".
4- Test YouTube Live streaming from your map
Before configuring the auditorium, we will test the ability for a speaker/moderator to stream from YouTube Live. Go to the members list, click on a member in the list that has the "speaker" tag and copy and paste the "Token access" URL. This "autologin" URL can be used to log into WorkAdventure with the given member.
Use this URL to login into WorkAdventure, on your map. Walk on the stage. Jitsi should open.
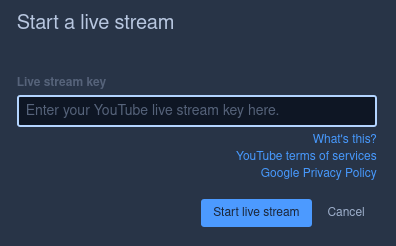
In Jitsi, click on the "start live-streaming" menu.

Now, in the popup that opens, paste the YouTube "stream key" and click the "Start live stream" button.
Streaming should start. Navigate to "YouTube Studio". You should see the Jitsi meeting in the YouTube Studio application.
5- Edit your map to configure the YouTube Live layer
You need to find the link to the embedded YouTube live stream and add it to your map.
In YouTube, click on the menu and select "Your channel".
Pay attention to the URL. It should look like this:
https://www.youtube.com/channel/UCL-AA7PSP9IUoZsJyxTwo2Q
The last part of the URL is the channel ID.
The URL to your live stream is:
https://www.youtube.com/embed/live_stream?channel=[channel ID]
On your map, you now need to create a openWebsite property whose URL is the URL of the live stream.
You also need to pass special "allow" properties to the iFrame to allow the user to put YouTube in full screen mode:
openWebsitePolicy: fullscreen; accelerometer; autoplay; clipboard-write; encrypted-media; gyroscope; picture-in-picture
In the end, the properties of the auditorium layer should look like this:

6- Test the setup
We are now ready to test. Just like in step 4, connect with a speaker account, walk on the stage and start live-streaming. With another browser / tab, connect with an additional user and walk in the auditorium. You should see the conference on stage being streamed automatically!