Configure the chat of WorkAdventure
This section details high level settings for the chat feature in WorkAdventure.
For a more detailed guide on how to create chat rooms, connect to Matrix on your phone, etc., please refer to the Matrix chat guide.
For an advanced explanation on how to manage access to room based on member tags see the Tag-Based Matrix Room Management guide.
Configuration features
If you want to edit the settings of the chat, you must go to the admin panel, and click on the edit button of the world. Once in the modal of World settings, swipe to the chat section.

Enable or disable chat
This will not disable all chat, but only Matrix chat rooms; the timeline (chat happening in the conversation bubbles) will remain active.
Enable or disable online user's list
This will show or hide the online user's list.
Enable or disable disconnected user's list
This will show or hide the disconnected user's list, i.e. the list of members that are not currently connected to your world.
Enable or disable file upload in chat
This will show or hide the upload button in the chat. If enabled, it will let each user upload a file in a chat.
Bring your own Matrix server
WorkAdventure relies on the Matrix protocol to provide chat features. It means that you can connect to your WorkAdventure account from any Matrix client, but it also means that you can connect your WorkAdventure world to your own Matrix server.
If you already have a Matrix server, you can set up your world so that any member of WorkAdventure is connected to your own Matrix server.
For this to work, your Matrix server must accept an SSO authentication method. Furthermore, this SSO authentication method should point to the same OpenID Connect provider as the one used in your world.
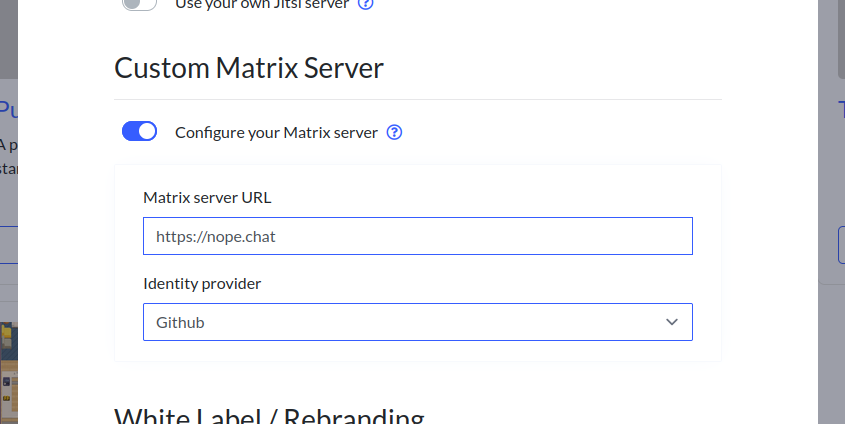
To configure your world to use your own Matrix server, you must go to the administration dashboard of your world. In the edition modal, you will find a section called "Custom Matrix Server".

Fill the "Matrix server URL" input field with the URL of your Matrix server (including "https://").
If your server supports SSO, the dashboard will fetch the list of all the identity providers available in your server. You will be able to select one of the configured identity providers. Make sure to select the same identity provider as the one used in your world.