Tock.ai bots
Virtual agents are currently in open beta. They can be used every month with a limited free trial, and beyond these limits, extra fees will apply. For more information, check the pricing page
What is Tock.ai?
Tock.ai is an open platform to build conversational agents in a traditional way. Its natural language processing engine is able to understand the meaning of sentences. The bot will then match the intent of the user with an appropriate (hard coded) response.
Bots developed with Tock.ai are less versatile than OpenAI bots. For instance, if you ask them the recipe of an apple pie, and if you have not provided the recipe in the bot's knowledge base, the bot will not be able to provide an answer. However, Tock bots are more predictable and more secure, as you control each of the answers of the bot. As such, they are a good choice if you are a large corporation and want to provide a controlled experience to your users.
WorkAdventure does not provide a Tock.ai server out-of-the-box. You need to have your own Tock.ai server to use Tock bots.
When you install Tock, the Tock bot container (image: tock/bot_api) must be exposed over HTTPS.
Configuring your Tock server
Connect to Tock Studio. In the "Settings" menu, click the "Configurations" tab. From there, you can check if your bot has a "Web" connector. If not, you can create one.
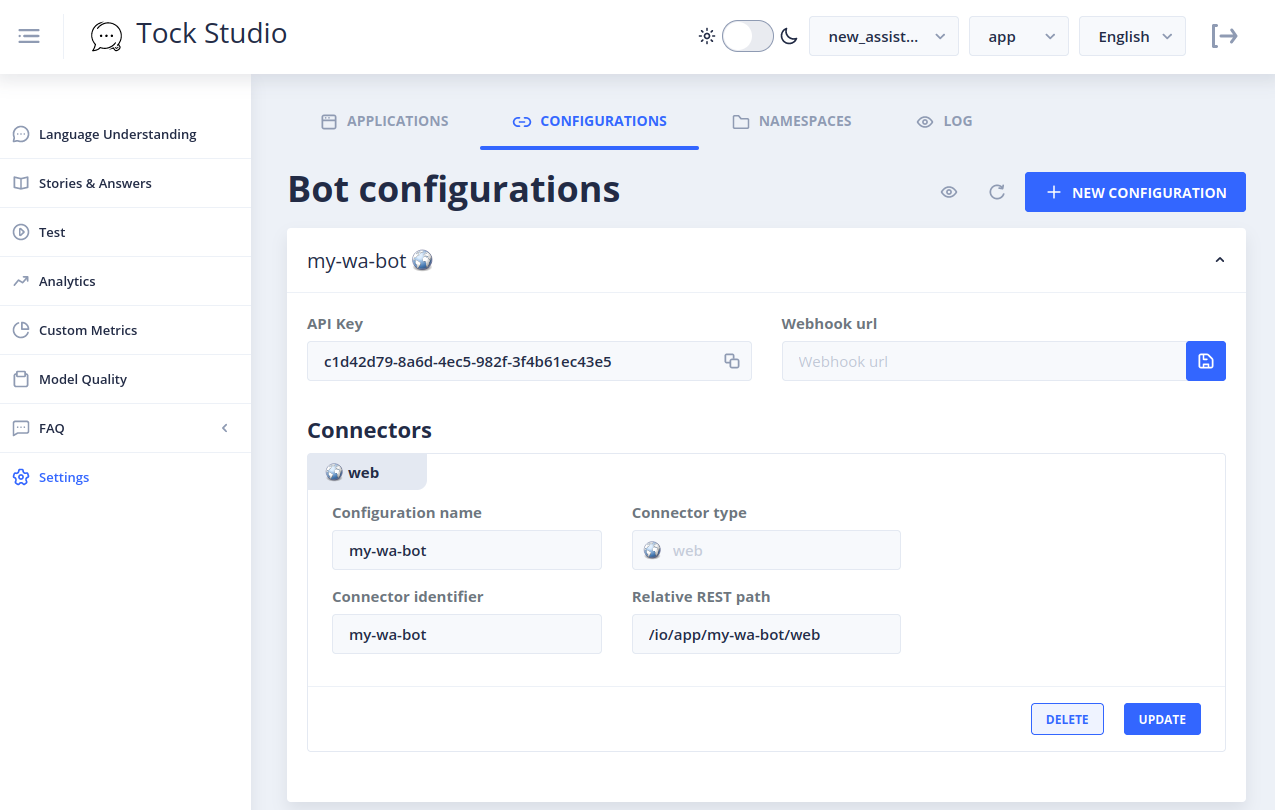
Take notice of the "Relative REST path" of the connector. This is the path that we will use to send messages to Tock.
This path is relative to the base URL of your Tock Bot container (tock/bot_api).
Now, let's set up the Tock bot in WorkAdventure.
Connect to your WorkAdventure room.
Click on the menu icon (the coffee cup), and then click on "Bots" menu item:
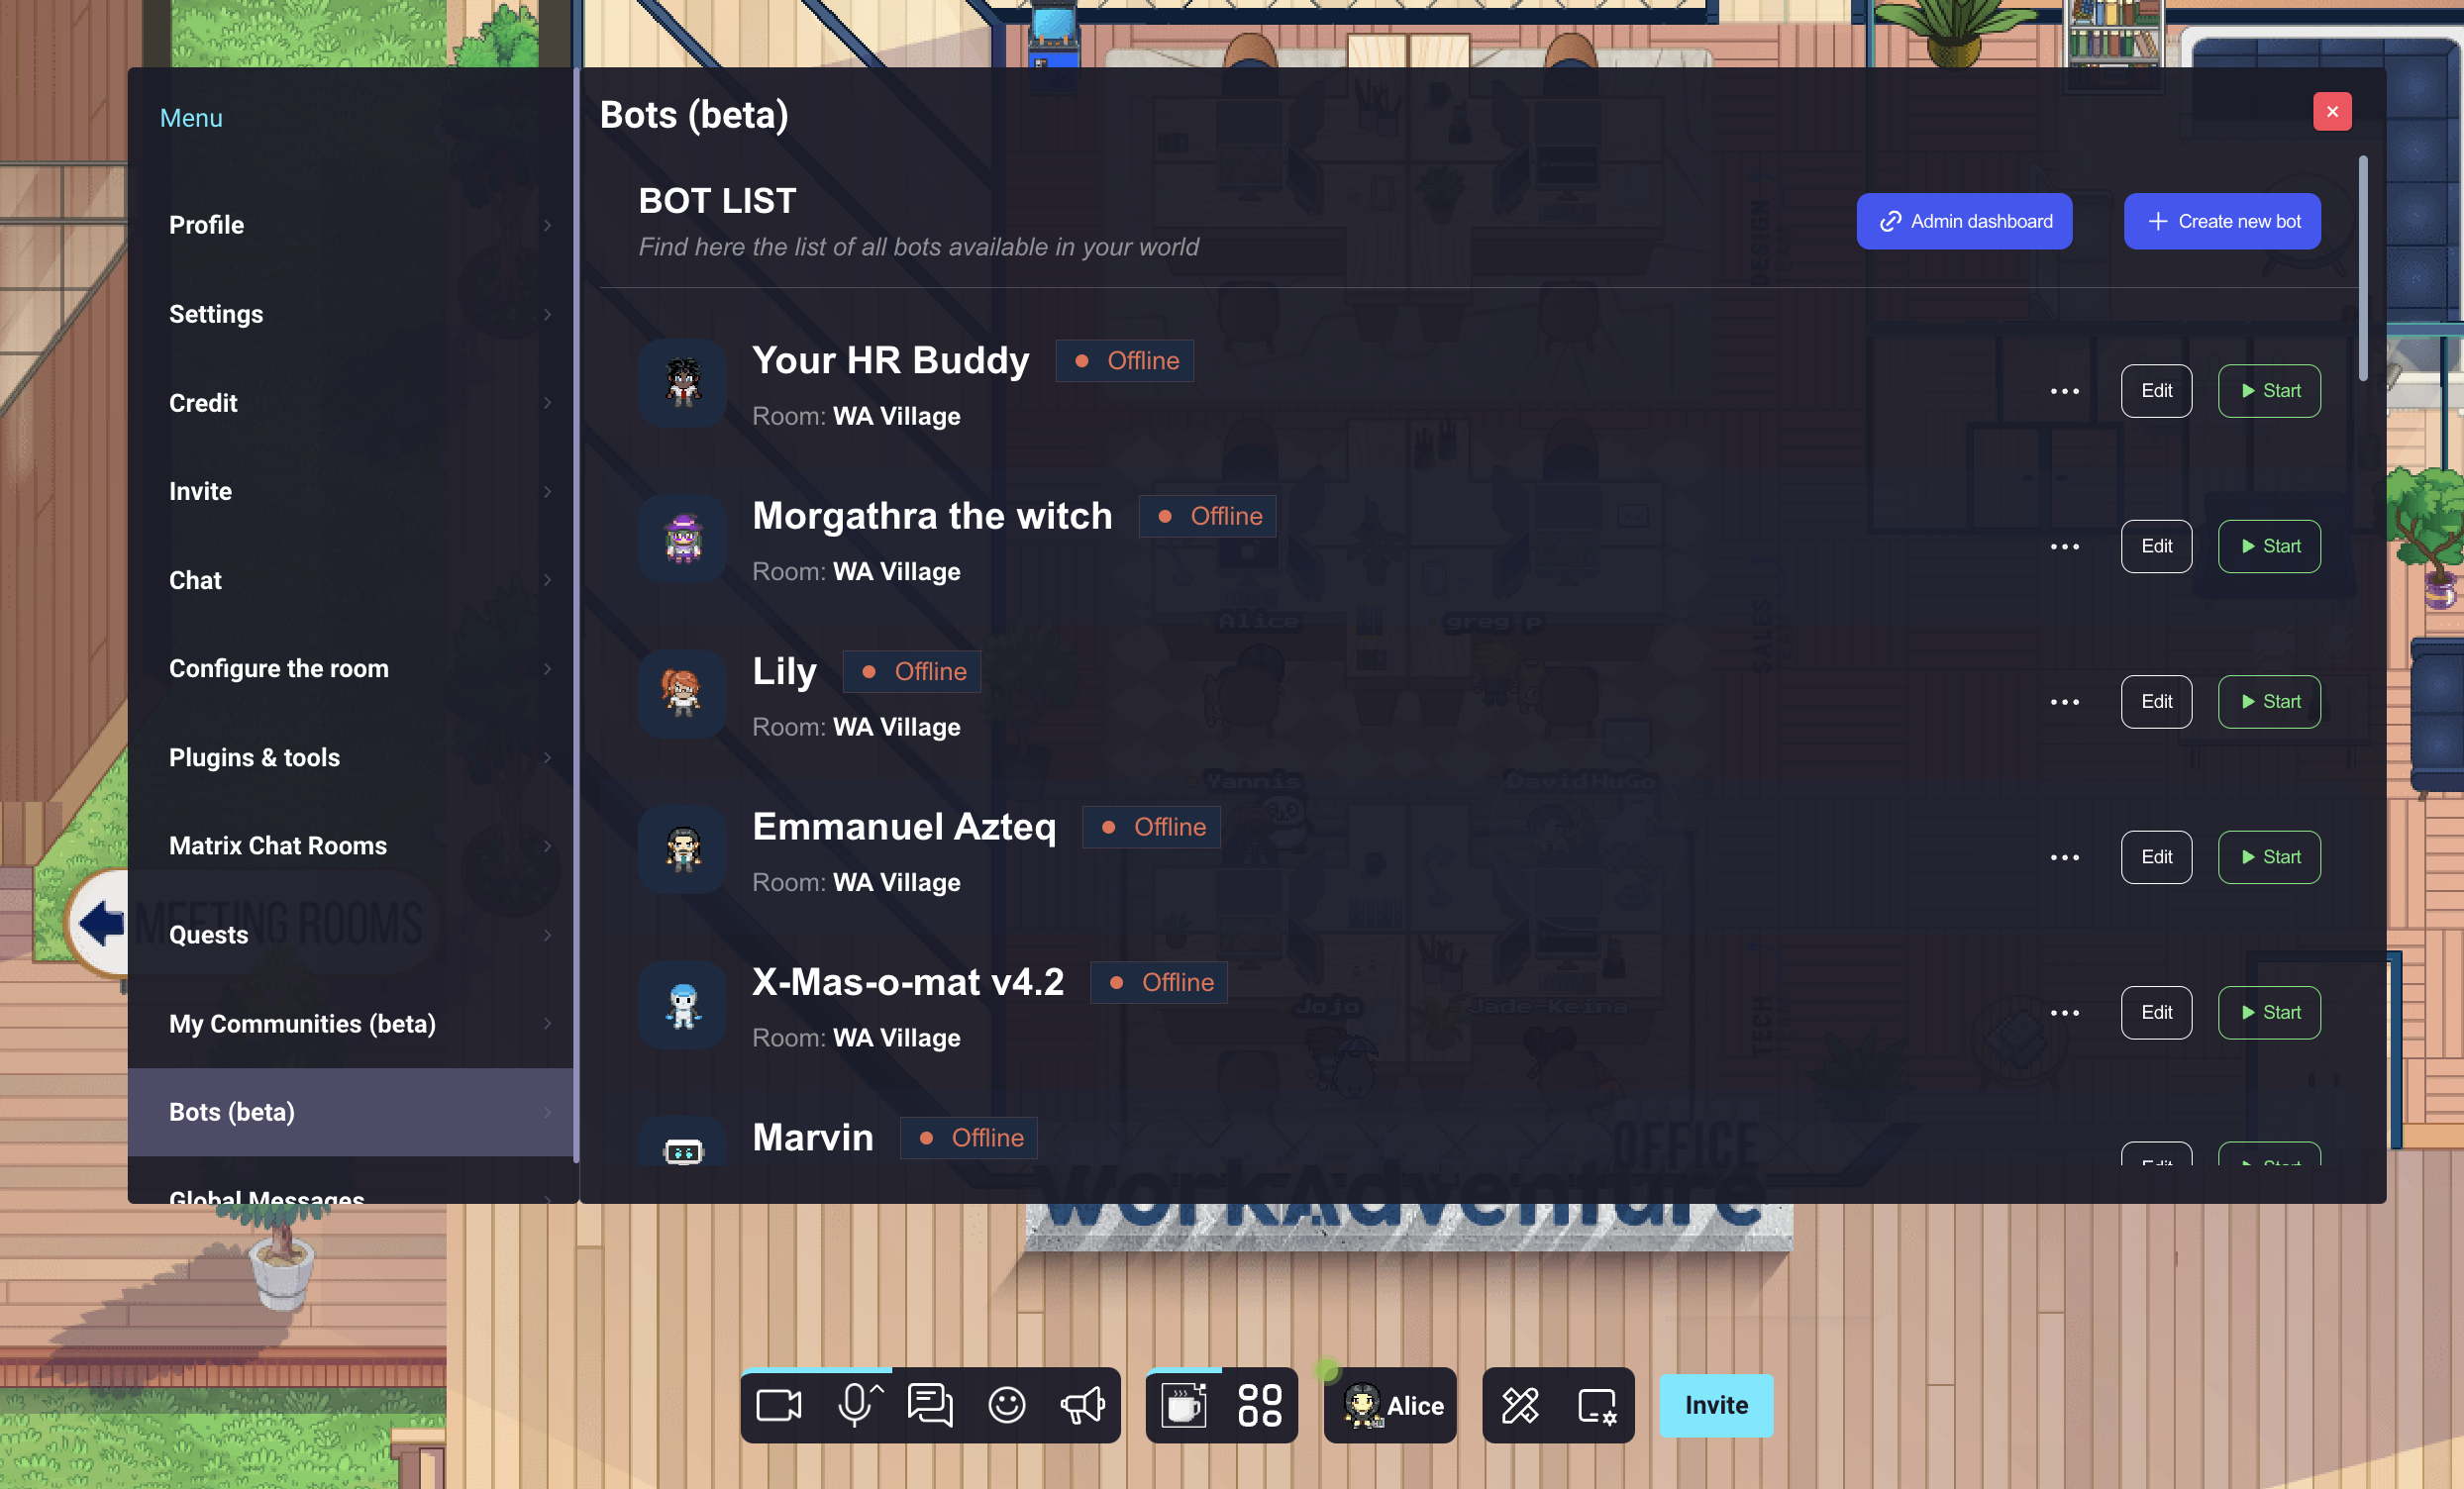
Click on the "Create new bot" button:
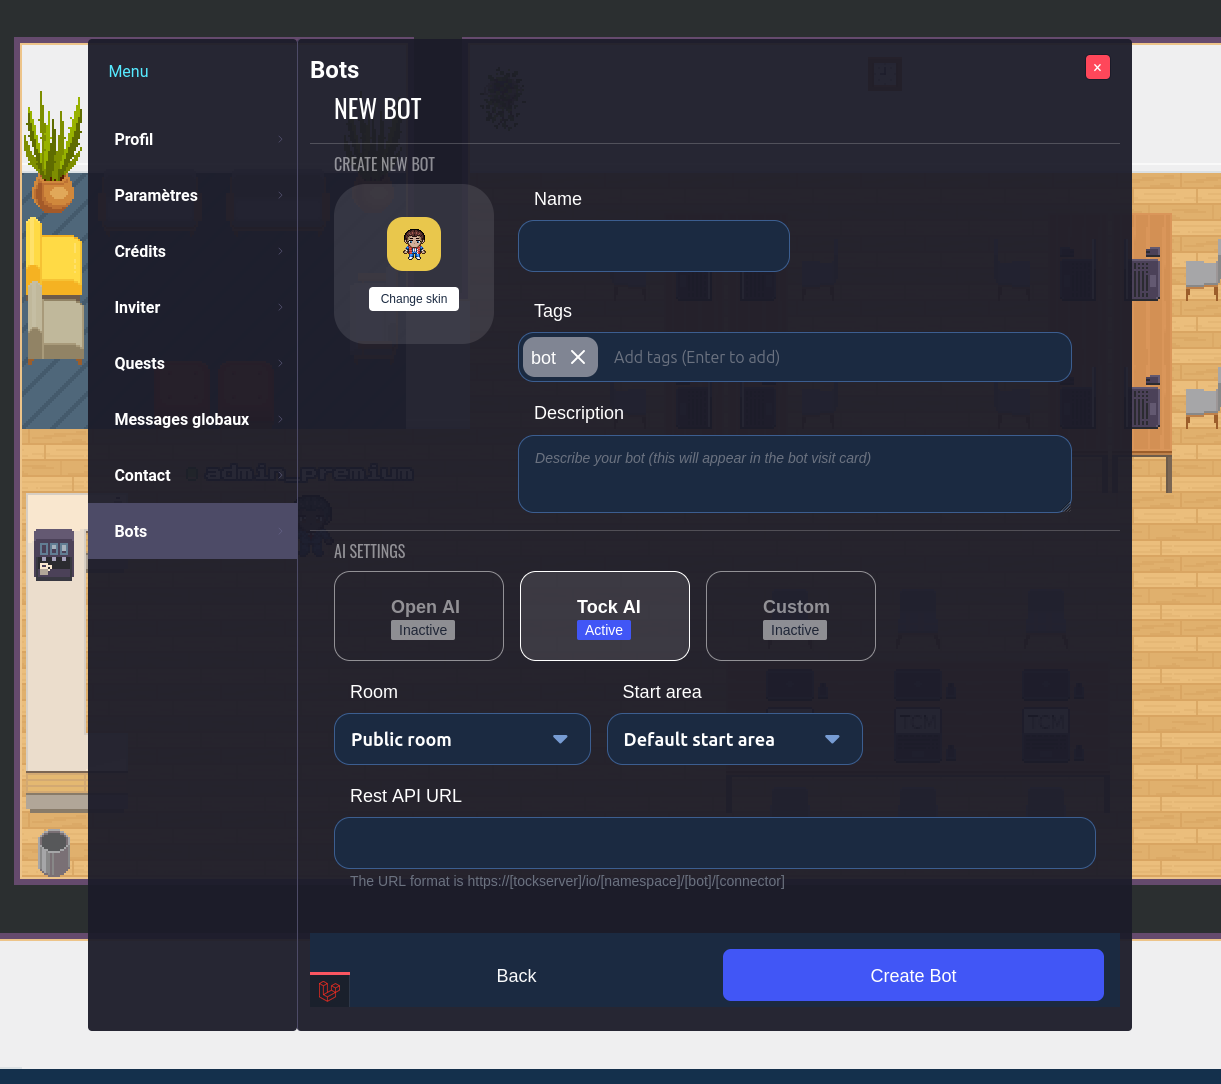
You can give the bot any name and choose any avatar you like (please note that since your bot has a "Bot" tag, it can select any Woka avatar that is reserved for bots).
Select "Tock" as the bot type.
In the "Rest API URL" parameter, enter the URL of your Tock server.
The URL of your Tock server is the full URL of the Tock bot API, including the relative path of the connector.
If your Tock Bot API is exposed at https://bot.tock.mycompany.com/, then you should enter https://bot.tock.mycompany.com/io/app/[tock-connector-identifier]/web in the "Rest API URL" field.
The URL must be exposed over HTTPS. It must also be accessible from the WorkAdventure server.
Finally, select a "Bot behaviour" for the bot. The movement mode decides how the bot will move on the map.
You have 2 options:
- Welcome newcomers: In this mode, the bot will walk to anyone who enters the room. It only welcomes people it never talked to before.
- Stay still: In this mode, the bot will stay in place and only move when summoned or when the Tock story says so.
Done? Save the bot.
You can now start the bot using the "Start" button.
When you start the bot, a headless browser containing the bot starts on the WorkAdventure servers. It will take between 1 and 2 minutes for the bot to be fully operational. If the servers need to scale, it could take as long as 10 minutes.
Sending actions to the bot from Tock
Tock Studio does not have a built-in way to configure or send custom actions. In order to send actions to the bot (like "move to this position", or "guide users to this position"), you can answer a JSON message instead of text.
When WorkAdventure detects an answer is a JSON message, instead of displaying the answer, it will turn it into an action performed by the bot.
Below is a reference of all available JSON messages you can send to your bot.
Bot special actions reference
Lead users to a given area on the map
The follow_me_to_area action will move the bot and all the users in the same bubble as the bot to a given area on the map.
The area must be declared in the TMJ file (using Tiled).
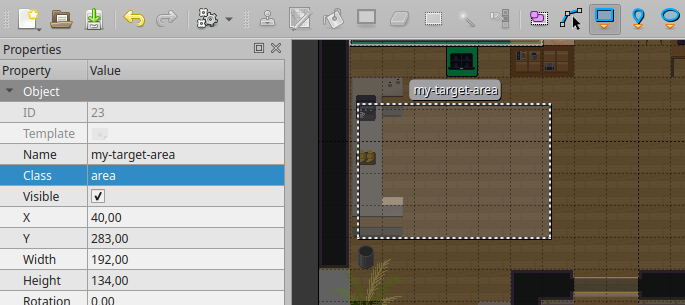
In order to create such an area, in Tiled:
- You must create a specific rectangular object on any "object layer".
- The object class must be "area"
- The name of the object must be the name of the area you want to move the bot to.
The bot will walk to the area and all users talking to the bot will automatically follow.
follow_me_to_area is extremely useful to plan guided tours of your map.
JSON message:
{
    "action": "follow_me_to_area",
    "area": "name_of_the_target_area_in_Tiled"
}
Move the bot to a given position
The move_to_position action will move the bot (the bot alone, not the users it is talking to) to a give (x,y) position
on the map.
JSON message:
{
    "action": "move_to_position",
    "location": {
        "x": 320,
        "y": 200
    }
}
xand y are expressed in "game pixels" (a size of a tile on the map or the size of a Woka is 32x32 pixels)
Move the bot to a given area
The move_to_area action will move the bot to a given area on the map.
The area must be declared in the TMJ file (using Tiled). See Lead users to a given area on the map to learn how to create an area.
JSON message:
{
    "action": "move_to_area",
    "area": "name_of_the_target_area_in_Tiled"
}
Open a website
The open_website action triggers the opening of a website for all users talking to the bot.
JSON message:
{
    "action": "open_website",
    "url": "https://example.com/some/url/to/open",
    "new_tab": false, // Set to true to open in a new tab
    "allow_api": true, // Set to true to allow the iframe to interact with the iFrame API.
    "policy": "fullscreen; accelerometer;", // The policy of the iframe
    "width": 50, // The percentage of occupation of the iframe in the screen (from 0 to 100)
}
Set a variable
A bot can change the value of any room variable by calling the set_variable action.
JSON message:
{
    "action": "set_variable",
    "name": "variable_name",
    "value": "any value"
}
Variables are a great way to interact with the map. Using the Scripting API, you could tie the state of a door to
a variable. Therefore, the bot would be able to open or close a door using the set_variable action.
Set a player variable
A bot can change the value of its own player variables by calling the set_player_variable action.
JSON message:
{
    "action": "set_player_variable",
    "name": "variable_name",
    "value": "any value",
    "persist": false,
    "public": true
}
You can decide if the player variable is visible to other players (using the public option, defaults to true).
You can decide if the player variable is persisted across bot restarts (using the persiste option, defaults to false).
Say something
A bot can say something using the say action.
The say action is mostly useless since you can directly return some text in any answer and the bot will say it.
Any answer that is not a valid JSON message will be said over the chat by the bot;
JSON message:
{
    "action": "say",
    "text": "Hello world!"
}
Wait
Use the wait action to have the bot wait between 2 actions. A Tock scenario can return several answers one after the
other. The wait action can be used to have a bot mark a pause before the next action.
JSON message:
{
    "action": "wait",
    "time": 1000
}
The time attribute is expressed in milliseconds.