Camera backgrounds
In WorkAdventure, everyone can blur their camera background or replace it with an image, from the Camera background tab of the device panel (see Blurring or replacing your background).
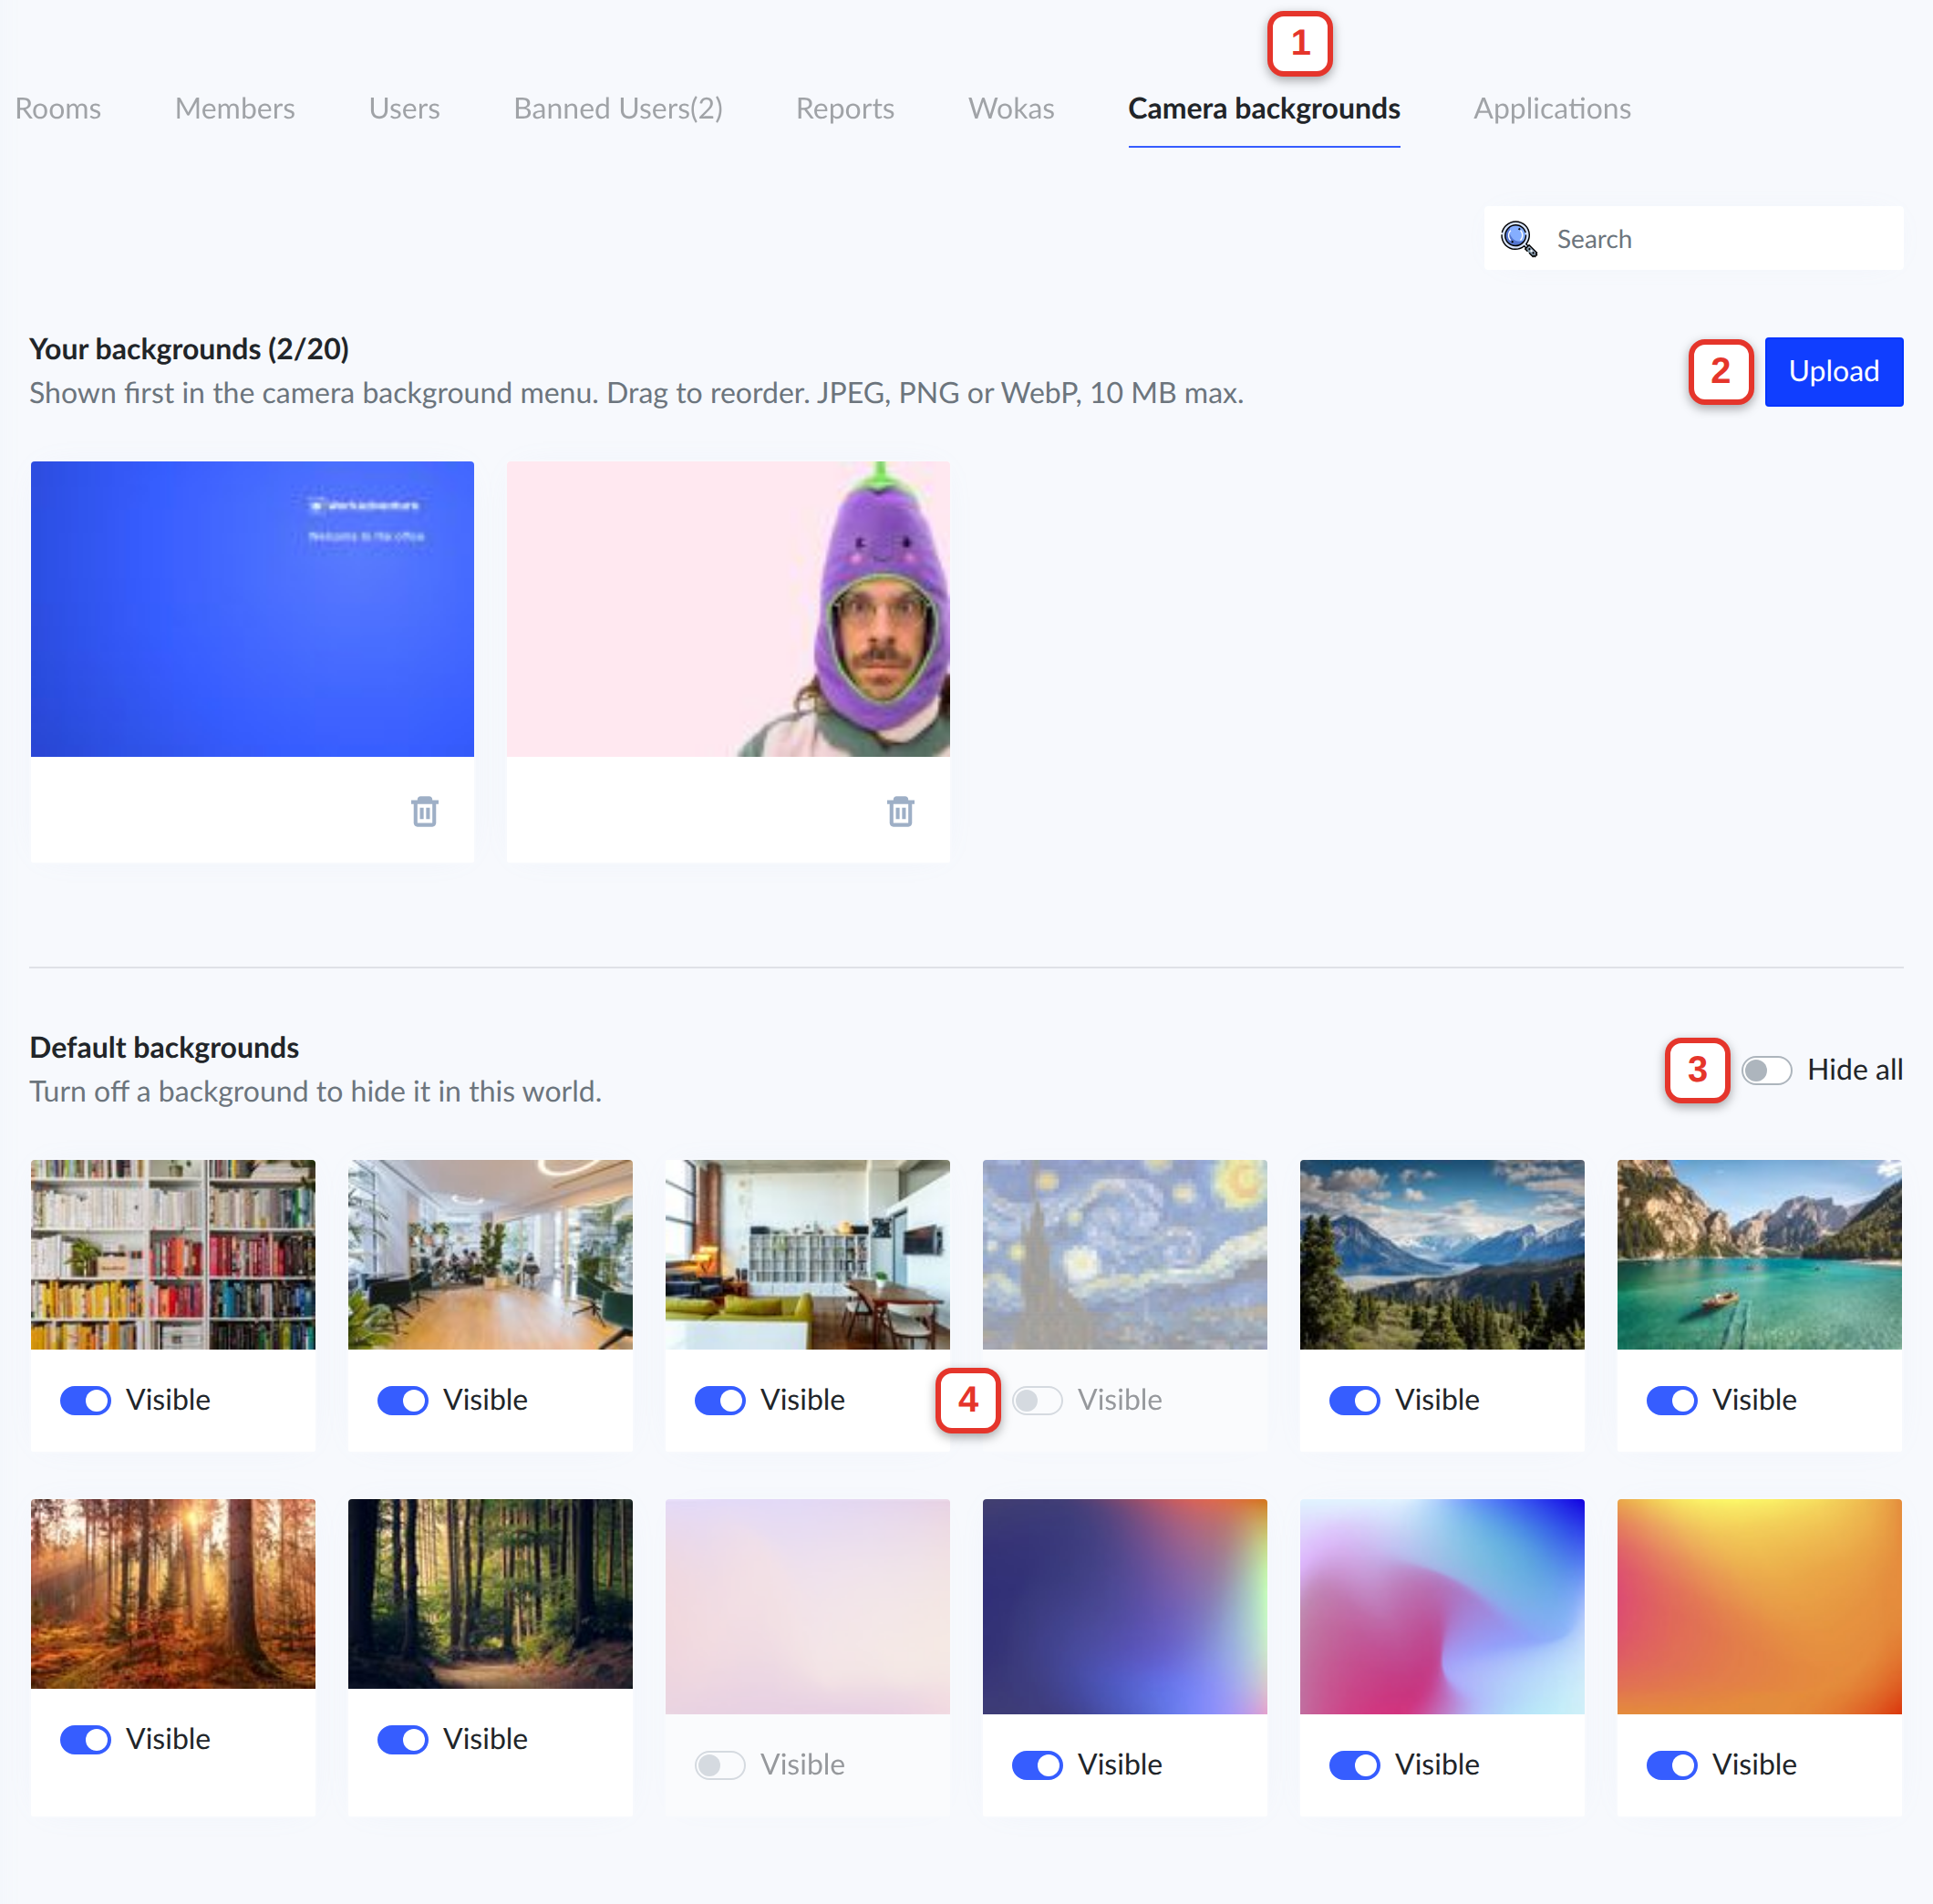
You choose which images your world offers: upload your own (your office, your brand colors…) and hide the built-in images you do not want. Open your world page and click the Camera backgrounds tab (1).
Changes are saved right away. They apply to every room of the world and to everyone who enters it, members and visitors alike. People already in the world see the new list when they reload the page.
Uploading your own backgrounds
Click Upload (2) and choose a JPEG, PNG or WebP image of 10 MB at most. You can upload up to 20 backgrounds per world, on top of the built-in ones.
Your backgrounds come first in the Camera background tab, in the order of the list: drag a background to move it. Click the bin icon under a background to delete it.
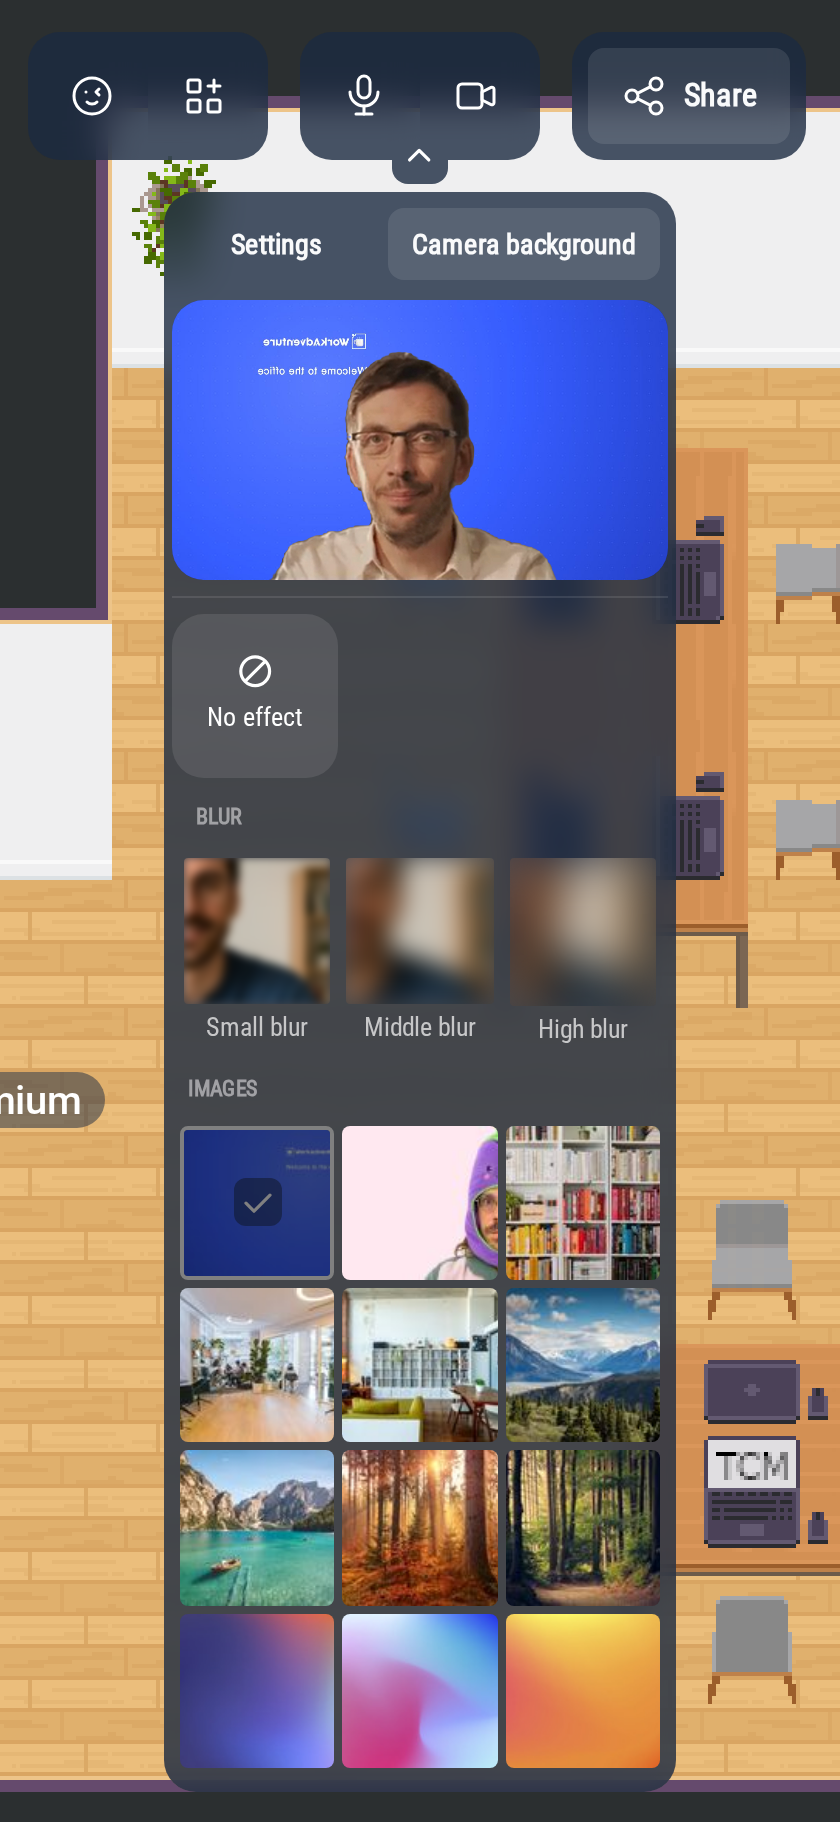
To get a good result:
- Use a landscape image, ideally 16:9 and at least 1280×720 pixels. WorkAdventure shrinks larger images to 1280 pixels on their longest side, and crops the image to the shape of each camera: keep logos and text away from the edges.
- People see their own camera mirrored, so text in the image reads backwards in their own preview (as above). The others see it the right way round.
- Avoid transparent areas: WorkAdventure converts every upload to JPEG, and transparent parts of a PNG or WebP image can turn black.
Hiding the built-in backgrounds
The Default backgrounds section lists the images WorkAdventure offers out of the box. Turn off the Visible switch under an image (4) to hide it in your world. Hide all (3) hides every built-in image, including any that WorkAdventure adds later. If you then turn one image back on, the others stay hidden.